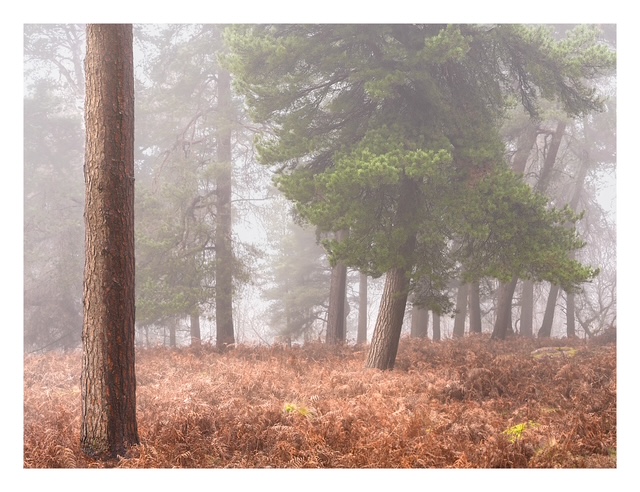
1. Simplify the Scene
Woodlands are naturally complex. Instead of trying to photograph everything, ask:
What initially caught my attention and what interest you about the scene?
Focus on your initial interest before removing distractions from your subject by:
Changing position, walk round your subject (360 degree if possible) as you could be in the wrong spot
Using a longer focal length, this however will compress your scene
Have a subject or story – what caught your attention?
- Tailor your aspect ratio to the composition. Cameras are set up to 3×2 however 4×3 can help with balancing your composition.
Sometimes less is more in the woods. Wide woodland scenes are naturally complex making photography problematic, however all part of the fun.
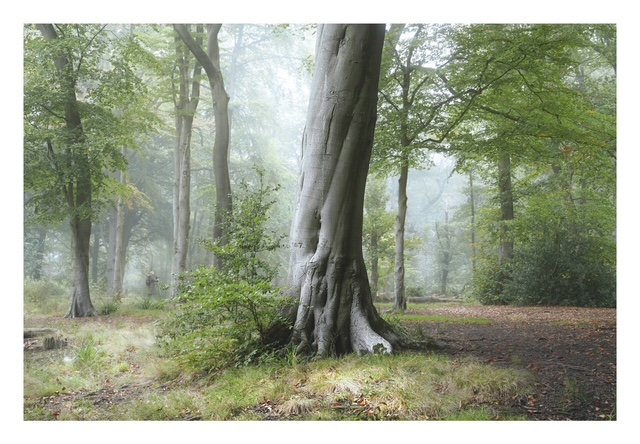
2. Shoot in Overcast Conditions
Overcast light can be your best friend. Don’t rule out overcast and rainy conditions.
It:
Softens contrast – creates subtle light which can improve your composition
Helps manage dynamic range in camera – heading out on a sunny day will be somewhat tricky. Managing bright highlights will ruin images
Reduces harsh shadows and lost detail
Makes greens richer
Bright sun often blows highlights and creates ‘patchy’ woodland scenes — clouds help create subtle light.
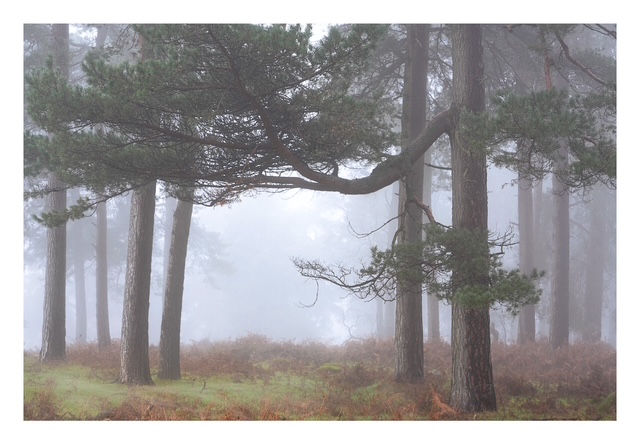
3. Use Fog for Depth
Fog naturally separates layers of trees, create atmosphere and a ‘background’
It:
Simplifies backgrounds – helping to make your subject standout (making your scene clear to the viewer)
Adds atmosphere
Creates depth
Removes clutter
Mist turns ordinary woods into something magical. I use Clear Outside app or the MET office to interpret weather – rain can have comparable results.
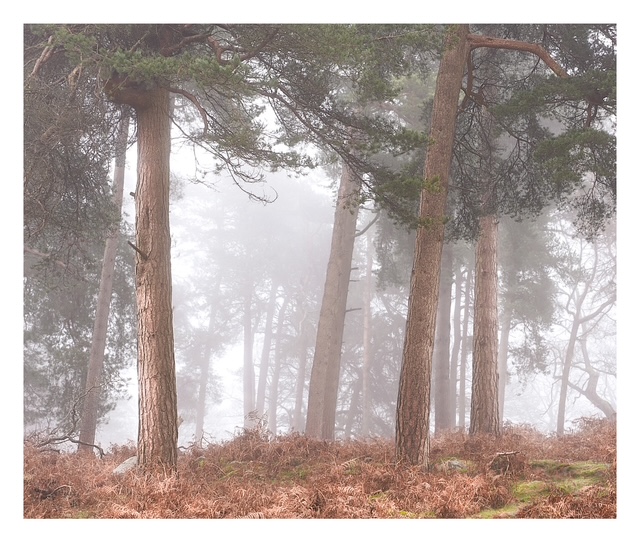
4. Look for Repetition
Woodlands are full of repeating vertical lines.
Use:
Even spacing between trunks
Similar tree shapes
Patterns in bark
Repetition creates calm and structure, however be mindful of the weight of your images.
5. Change Your Height
Most people shoot from standing eye level.
Try:
Getting lower for foreground interest
Shooting upward for towering drama
Finding small elevated spots for better separation
A shift of a few inches can transform composition and help tackle cluttered floors
6. Use a Polariser
A circular polariser:
Cuts glare off wet leaves
Deepens greens
Reduces reflections
Adds contrast on overcast days
It’s one of the most useful woodland filters. I also like black mist filters.
7. Isolate with a Telephoto Lens
A longer focal length:
Compresses layers
Blurs busy backgrounds
Highlights shapes and light
Telephoto lenses help tame woodland chaos, however be mindful what compressed scenes look like.
8. Look for Light Beams
Backlight creates magical light rays.
Look for:
Sun filtering through branches
Rim lighting on leaves
Early morning or late afternoon glow
Expose for highlights to preserve atmosphere. Woodland photography isn’t always ‘slow’ – in a rush always check your exposure in camera.
9. Photograph Details
Not every woodland image needs to be wide. You will see interest in the woodland no one else does.
Look for:
Mushrooms
Fern patterns
Moss-covered trunks
Leaf textures
Intimate woodland scenes are powerful. Especially if you’re struggling to shoot wider scenes, a great way to change your approach.
10. Use Leading Lines
Paths, streams, fallen logs and natural clearings guide the eye through the image.
They:
Create depth
Add structure
Make images feel immersive
Leading lines give direction in a busy scene.
11. Embrace the Seasons
Each season transforms the forest:
Spring – fresh greens and flowers
Summer – dense texture and deep colour
Autumn – warm tones and contrast
Winter – graphic shapes and minimalism
Revisit the same location throughout the year.
12. Underexpose Slightly for Mood
Slightly darker exposures:
Increase atmosphere
Add depth
Reduce washed-out highlights
Woodland photography often feels better slightly moody.
13. Slow Down
Walk slowly. Stop often.
The best woodland images are rarely obvious, slow walking helps can in changes in conditions and see compositions. Woodlands are complex enough without subjectively making your experience arduous.
14. Use a Tripod
Woodlands are often darker than you think.
A tripod allows:
Lower ISO
Longer exposures and high dynamic range techniques
Sharper details
Intentional composition
Precision matters in woodland photography. Costly but a carbon fibre tripod will negate ‘weight’ concerns. It’s a perfect grounding ritual too.
15. Return Often
Woodlands reward familiarity.
By revisiting:
You learn how light behaves
You anticipate fog conditions
You build a stronger portfolio
Mastery comes from repetition. You won’t always walk away with an image but you’ll learn to understand why.